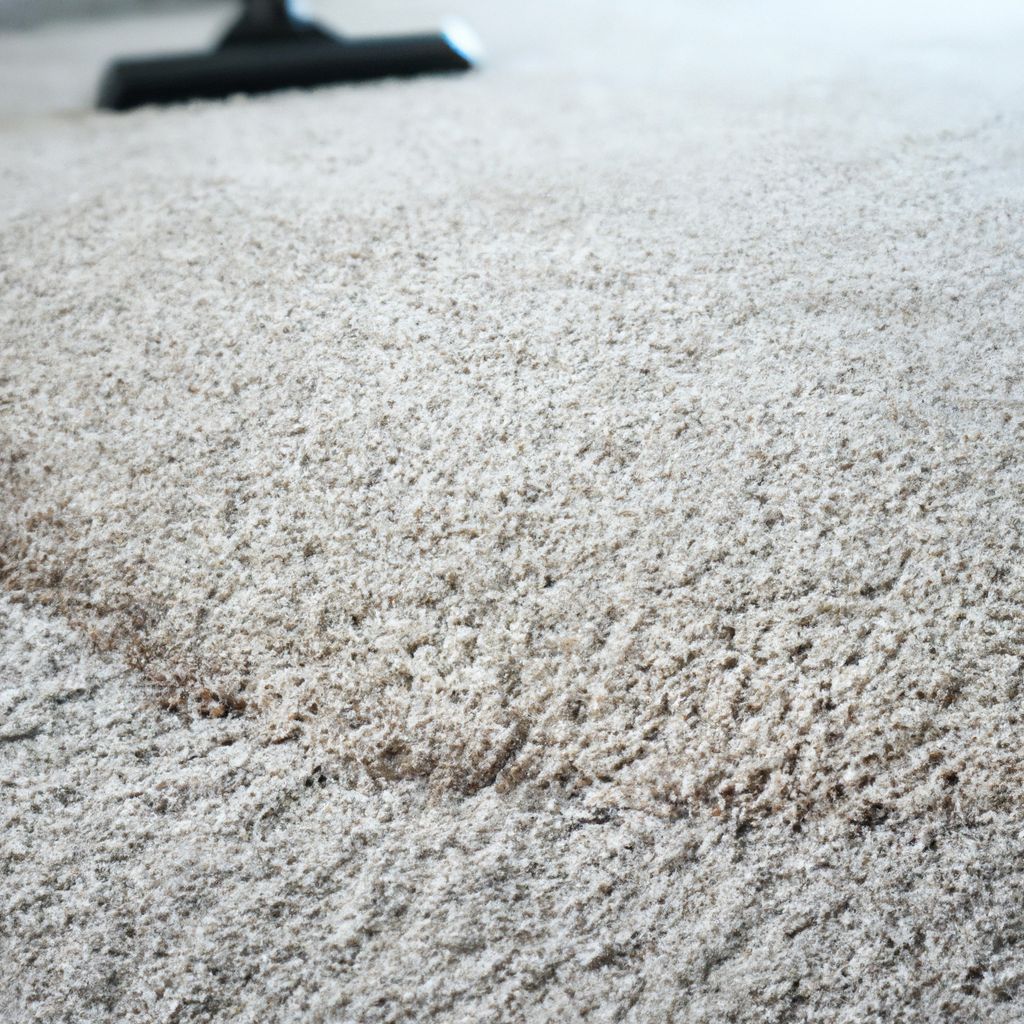
There’s a Lighter Rectangle Where the Rug Used to Be – Will Cleaning the Carpet Even It Out?

The letting agent was annoyed before I’d got my shoes off. A two-bedroom flat off Clapham Common, tenants gone after five years, and a pale oblong in the middle of the living room carpet, two metres by three, with crisp edges where a rug had sat for the whole tenancy. The landlord wanted it cleaned out before the next viewing on Thursday. Failing that, he wanted the tenants to pay for a new carpet.

“Can you get rid of it or not? I need to tell him today.”

Not entirely. That wasn’t what either of them wanted to hear, and nine times out of ten it’s the answer I end up giving about a rug-shaped rectangle.

Why Does a Rug Leave a Rectangle on the Carpet?

Because the carpet around the rug has spent years living a different life from the carpet under it.

Two things happen to the exposed part of a room. It gets walked on, so soil builds up in the pile, and that greys the colour and dulls it. And it gets light – daylight through the windows, with its ultraviolet component slowly breaking down the dyes in the fibre. The patch under the rug gets neither. It stays close to the colour the carpet was on the day it was fitted.

So the rectangle looks lighter or a slightly different shade, depending on which of those two effects has been stronger. In a north-facing room with a busy family, soil usually dominates. In a south-facing room with a big bay window and not much traffic, fading does.

In most rooms it’s a mixture, and the mixture decides everything about whether cleaning helps.

Crushed Pile Plays Tricks With the Light

There’s a third effect that has nothing to do with colour. A rug presses the pile beneath it flat in one direction for years. When the rug comes up, those tufts lie at a different angle from the rest of the room and reflect light differently, so the rectangle can look lighter from the doorway and darker from the window. Walk round it. If the rectangle changes as you move, at least part of it is pile, and that part responds well to cleaning and grooming.

How Can You Tell Soiling From Sun Fading?

Get down on the floor with a torch and a white cloth.

Soil sits on and around the fibres. Rub a clean, dry white cloth firmly across the carpet just outside the rectangle, then across the carpet just inside it. If the outside cloth comes up noticeably greyer, a good share of the difference is dirt. Soiled carpet also tends to feel slightly harsh or gritty to the hand compared with the protected area, which usually feels softer.

Fading is in the fibre itself, and no cloth will pick it up. It shows most on the tips of the tufts, which are what the light hits, and on the side of the room nearest the window. Check the carpet along the skirting boards and behind the sofa as well. Those areas get little traffic and less light, so they give you a rough idea of the carpet’s original colour.

Wool carpets and nylon carpets dyed after the yarn was made are the most likely to fade. Many polypropylene and some nylon carpets are solution-dyed, meaning the colour went into the fibre while it was being made, and those resist fading far better. A mostly grey-beige polypropylene in a rental flat will nine times out of ten turn out to be soiled.

The Base of the Tuft Test

This is the most useful check of all, and it takes a minute.

Part the pile with your fingers in the exposed area, somewhere near the window, and look down into the base of the tufts. The base of a tuft gets very little light even in a sunny room. If the tips are clearly paler than the base, the carpet has faded. If the tips and base are the same colour but the whole tuft looks grey and dull, you’re mostly looking at soil.

In the Clapham flat, the tips of a sage-green wool twist nearest the bay window were almost oatmeal. The base of the same tufts was still green.

What Does a Professional Clean Do to the Rectangle?

It removes the soil, and only the soil.

A thorough hot water extraction clean, with proper pre-vacuuming and a pre-spray worked into the pile, will lift most of the greyness from the exposed carpet. The protected rectangle gets cleaned as well, of course, but it has much less to give up. On a carpet where soil was the main difference, the two areas come much closer together, and in some rooms the rectangle disappears almost entirely. The pile gets groomed upright at the end, which deals with the crush.

That’s the good outcome. It happens in north-facing rooms and in basement flats where the sun barely reaches the floor.

The less welcome outcome happens where the sun has been doing the work.

When the Rectangle Changes Colour After Cleaning

Before cleaning, soil on a faded carpet can hide some of the fading. Grey soil on pale, sun-bleached tips and the deeper original colour under a rug can end up looking closer together than they are. Clean the soil out and you reveal the true difference: faded carpet all around, and a rectangle of rich, unfaded colour in the middle.

People expect the rectangle to go. Instead it can look darker and sharper than it did before we arrived.

In a Georgian terrace in Islington, a customer had a claret wool carpet in a first-floor drawing room with two tall south-facing sash windows. Her rug had been down for about eight years. Before cleaning, the rectangle looked slightly lighter than the rest of the room, because the rest of the room was dirty. After cleaning, the rest of the room was a clean, faded dusty pink, and the rectangle was deep claret. She took it well. I’d warned her twice.

When a customer isn’t sure, we clean a test strip first. A strip about a metre long and a hand’s width across, running from well outside the rectangle to well inside it, cleaned and dried with an air mover while we wait. Twenty minutes later you can see exactly what a full clean will do to the edge. If the strip shows the rectangle fading away, we carry on with the room. If it shows the rectangle sharpening, the customer decides whether to go ahead knowing that, and plenty of them still do, because a clean faded carpet with a crisp dark rectangle in it is still a clean carpet, and the rug is going back down on top anyway. A few decide to leave the carpet as it is until they’ve bought the next rug. The strip is small enough to blend back in once the room is cleaned, whenever that happens.

This is why I won’t take on a rectangle job without looking first, and why the Clapham agent got a phone call before anyone booked anything.

Can Faded Carpet Be Re-Dyed to Match?

Small areas, yes. A whole room, not realistically.

Colour restoration on carpet is a real skill. A trained technician can spot dye a small bleach mark, or a few faded tufts, using acid dyes on wool or nylon, building the colour up gradually until it blends. It works because the area is small and the eye has a clear reference colour right next to it.

Tinting a whole faded room back towards its original colour is another matter. The fading is uneven – stronger by the windows, weaker by the door – so the dye has to be graded across the floor by eye. Polypropylene won’t take dye at all. On wool, the result can look good on the day and patchy in a week once the customer has seen it in morning light. I think colour-matching a whole faded room is a fool’s errand, and I’ve turned down that job more than once when the customer was willing to pay for it.

What About Yellow Marks From the Rug Pad?

Sometimes the rectangle isn’t lighter but faintly yellow or brown, often in a pattern of grid lines or dots. That’s usually the underlay the rug sat on. Some rubber and PVC rug grippers release plasticisers over time, and those can stain the carpet beneath them. Those marks sometimes lift partly with solvent spotting, sometimes not at all, so tell the cleaner about the rug pad before they start.

What Should You Do About the Rectangle Instead?

Nine times out of ten, the cheapest fix is to put a rug back.

It doesn’t have to be the same rug or even the same size, as long as it covers the rectangle’s edges. A slightly larger rug hides the whole thing. Rearranging furniture so a sofa or a bed sits across the rectangle also works.

Time helps too. Once the rectangle is exposed, it starts fading at the same rate as the rest of the room, and in a sunny room the difference narrows noticeably over a couple of years, though it never quite catches up.

In a rental property, fading from daylight is generally treated as fair wear and tear, and a landlord would struggle to charge a tenant for a sun-faded carpet. Soil is different. A carpet left very dirty at the end of a tenancy is a fair cleaning charge. The Clapham flat got cleaned for its soil, and the landlord bought a large jute rug for the viewing.

Blinds on the South-Facing Window

For anyone fitting a new carpet in a sunny room, a UV-filtering blind or window film does more to prevent a future rectangle than any cleaning ever will. So does choosing a solution-dyed fibre for that room.

A customer in Enfield did both after her first carpet faded. Her new one still has a small rug in front of the fire. Every spring she turns it by a quarter.

A spacious living room of an upscale upper-floor flat in Knightsbridge, London

Can a Cowhide Rug Be Professionally Cleaned, or Will Water Ruin It?

“I paid three hundred pounds for the thing. Why would I pay you a third of that to clean it?”

It’s a fair question, and the woman asking it in Primrose Hill had a fair point. Her cowhide lay under a glass coffee table, pale brown and white, with a red wine mark the size of a saucer on one of the white patches and a general greyness in the areas where people put their feet. She had already been told online to wipe it with a damp cloth. She’d done that on a smaller mark the month before, and the patch of hide underneath had gone hard and slightly puckered.

Water can ruin a cowhide. A cowhide can still be cleaned. The two statements sit together more comfortably than most people expect.

What Happens to a Cowhide When It Gets Wet?

A cowhide rug is leather with the hair left on. The skin has been tanned – usually with chromium salts, which make it soft and stable – and then treated with oils and fat liquors that sit between the collagen fibres and let them slide past each other. That lubrication is what makes a hide feel supple. Take it away and you’re left with something closer to a piece of cardboard.

Soak the hide and the water carries some of those lubricants out. As the skin dries, the fibres bond more tightly to each other without them. The leather stiffens and shrinks, and if it dries unevenly it puckers. On a thin, cheap hide this can happen after a single mopping-up of a spilt glass of water left overnight.

The hair itself tolerates moisture far better than the skin does. The problem is getting moisture into the hair without letting it reach the leather underneath, and on a short-haired hide the distance between the two is a few millimetres.

Why the Edges Curl First

The edges of a cowhide are the thinnest and most exposed part of the skin. They dry first and shrink most, so as the middle of a wet hide stays damp, the edges tighten and lift off the floor. Once they’ve curled, they often stay curled. To my mind, a hide with curling edges tells you more about its history than any stain on the hair does – somebody, at some point, got it wet and let it dry in a hurry, often next to a radiator.

How Do Professionals Clean a Cowhide Rug?

Mostly dry, with as little water as the job will allow.

We start by turning the hide over. The back tells us how it was finished and whether earlier water damage has left hard, dark patches. Some hides also have a felt backing glued on, which changes how carefully we handle moisture. We also check the hair side for printing or dye. A lot of hides sold now are dyed or printed with animal patterns, and those colours can move with even mild cleaning chemistry. A hide that has been dyed gets a test on a hidden corner first.

Then the soil comes out. A cowhide traps more grit than people think, especially along the grain of the hair where it lies flat. We take the hide outside and shake it hard, holding it by the edges. After that comes slow vacuuming with a soft brush attachment, suction turned down, working in the direction the hair lies.

For general greyness and light greasy soil, we use a dry cleaning compound: a slightly damp absorbent powder, a bit like fine sawdust, carrying a small amount of cleaning solvent. It gets brushed into the hair with the grain, left for a short time to absorb the soil, and then vacuumed out. This does most of the work on a dull hide without putting any real moisture near the leather. Fur cleaners have used variations on this principle for generations.

Individual marks get a spot clean with dry foam. We whip a mild, pH-balanced shampoo suitable for leather into a stiff foam, lift only the foam onto the hair with a soft brush, and work it into the mark. The foam carries very little water, and what water there is stays in the tips of the hair. Then we blot straight away with a clean white towel, pressing along the grain, and repeat until nothing more transfers.

Things that shouldn’t go near a real cowhide: a carpet shampooer, a steam cleaner, a bucket and sponge, or a washing machine. Some manufacturers of printed hides say otherwise on their care labels. I’ve seen two hides come back from a domestic machine. The worse of the two came from a flat in Twickenham, and it looked like a leather jacket that had been left crumpled in the rain for a week. It never lay flat again, and it took the owner a good while to stop blaming the washing powder.

Drying is flat, in a cool room with a fan moving air across the surface. Never near a radiator. Never in sun. Never with a hairdryer.

If the leather underneath has stiffened in places, from our cleaning or somebody else’s attempt, we work a leather conditioner into the back of the hide in thin coats and flex it gently by hand as it absorbs.

The Primrose Hill hide took just under two hours from start to finish. The greyness came out almost completely with the dry compound, and the wine mark faded to a faint pink that you had to kneel down to see.

Brushing With the Grain

Cowhide hair lies in one direction, generally from the neck end towards the tail. Brushing against it lifts the hair and, on an older hide with weak hair roots, pulls it out. Every step of the cleaning above – vacuuming, compound, foam and blotting – follows the grain. At home, running a hand across the hide tells you which way it lies in a second. Smooth one way, rough the other.

Which Stains Can Come Out of a Cowhide?

Most fresh food and drink spills respond well if they’re blotted straight away and not rubbed. Coffee and tea on the brown patches barely show. Red wine on a white patch is harder, and often leaves a faint shadow. On the Primrose Hill hide we worked the foam into the mark in several short rounds, blotting between each, and stopped while the hair was still only just damp at the tips. Pushing for the last trace of pink would have meant pushing water down to the skin, and a faint pink shadow on white hair is a lot easier to live with than a hard, shrunken patch of leather under it. Grease marks from food or hand cream lift well with dry compound because they sit in the hair and don’t soak into the leather.

Ink and felt tip usually stay. So does dye transfer from a wet coloured item left lying on the hide.

When a Dog Has Used It

Urine is the hardest problem with a cowhide, because it soaks straight through the hair and into the skin, where it dries and can leave a stiff patch and a lasting smell. Cleaning the hair doesn’t reach it. Washing the leather ruins it. To my mind a cowhide that a dog has used more than once is a replacement job, and I’d tell a customer that before quoting.

Why Is My Cowhide Losing Hair or Splitting?

Some hair loss is normal wear. Areas where people walk or feet rest wear the hair down gradually, and eventually leave a thinning patch. That takes years.

Sudden hair loss in patches is different. It usually means the hide got wet and the hair roots were loosened, or it was poorly tanned in the first place. Brushing a patch like that pulls out tufts. There’s no way of putting the hair back.

Splits in the leather come from dryness and flexing. A hide that lives on underfloor heating, or on a floor where chairs push and fold it every day, loses its oils over time, and eventually the skin cracks along a line where it bends. In a house in Wandsworth, a cowhide under a kitchen table had split in three places where the chair legs dragged across it every mealtime.

Can a Split Be Repaired?

Usually. A strip of thin leather or tough fabric glued to the back of the hide across the split, with a flexible leather adhesive, holds it together and stops it spreading. From the hair side the repair barely shows once the hair is brushed across it. It won’t make an old, dry hide young again, but it will keep it on the floor for a few more years.

Is It Worth Paying to Clean a Cowhide at All?

Sometimes, and it depends mostly on what the hide cost and how much you like it.

A good-quality natural hide in a large size is worth cleaning properly. A cheap printed hide that cost less than a family meal out may not be. Neither is a hide with widespread hair loss or urine damage, however well it’s cleaned.

Here’s the opinion that loses me work: cowhides don’t belong under kitchen or dining tables. They get chair legs, food and drink at the same time, and no amount of cleaning keeps them looking good for long. A hide in a living room or bedroom, away from direct sunlight and heating, can go years with nothing more than regular care at home. To my mind, that’s where they belong.

Care That Keeps a Cowhide Out of the Workshop

Shake it outside every few weeks, holding it by the edges, and vacuum it with the brush attachment and the suction turned down, following the grain. Turning it round every few months spreads the wear.

A customer in Hornchurch has had her hide for eleven years doing exactly that. She hangs it over the back fence on the first dry Saturday of every month, and the neighbours’ cat sits underneath it.

Why Does a Turkish Kilim Come Back Smaller and Out of Square After It’s Been Washed?

Before anyone washes your kilim, get a tape measure and write down five numbers. The length down each side, the width across each end, and the distance between opposite corners. Then do the second diagonal and make it six.

Those numbers settle arguments. They tell you whether the rug has shrunk and how far a good workshop can bring it back. Most customers who ring us about a kilim that came back small from another cleaner have no idea what size it was before, and a few centimetres of memory against a few centimetres of tape is a conversation nobody wins.

What Makes a Kilim Shrink When It Gets Wet?

A kilim is a flatweave. It has no knotted pile, only a set of warp threads running the length of the rug and wool weft threads packed tightly across them, back and forth, so densely that the warps disappear. The pattern you see is entirely weft. The structure holding it together is entirely warp.

Water gets into both. Fibres swell as they absorb it, and as a yarn swells in thickness it pulls in along its length. When it dries under no tension, it doesn’t necessarily return to where it was.

Cotton Warps and Wool Wefts

The trouble usually starts with the warps.

Older Anatolian kilims were often woven on wool or goat-hair warps, and wool warps under wool wefts tend to move together evenly when wet. A great many kilims made for the export market over the last few decades use cotton warps, which are cheaper and more consistent to weave with. Cotton shrinks more than wool when soaked, and it does so along the length of the rug. The wool wefts, meanwhile, relax and can spread slightly. The result is a kilim that loses length faster than width, sometimes by five or six centimetres on a two-metre piece.

Hot water and tumble drying both make it worse. So does a long soak.

A power-loomed kilim-style rug from a furniture chain is a different animal. It’s usually polypropylene or a polyester blend woven by machine under even tension, and it barely moves in water at all. Its problems when washed are fading and a flattened, shiny surface.

Why Does a Kilim Go Out of Square as Well as Shrinking?

Because it was probably never square in the first place.

A kilim is woven by hand on a loom, often by more than one weaver, and the tension on the warps changes as the work goes on. One side gets beaten down harder than the other. A weaver who stops for a season leaves a slight change in the weave where she started again. Warps from different batches of yarn shrink by different amounts. None of that shows much when a new rug is lying flat on a shop floor. Soak it, and every difference in tension comes out at once. The long sides stop running parallel and the diagonals no longer match.

If anything, a kilim that comes out of a wash slightly irregular is showing you how it was made.

The Dealer’s Stretch

Here’s the part the rug trade doesn’t advertise. Many kilims are washed and stretched square before sale – pinned out wet on a frame or a floor and left to dry under tension, so they lie straight and flat in the showroom. That’s a legitimate finishing step. But it’s temporary. The yarn holds that stretched shape only until it gets thoroughly wet again, and then it goes back towards the shape the weaving gave it.

A customer from East Dulwich brought us a kilim she’d bought from a dealer on Portobello Road a few years earlier. It had been beautifully square in the shop. After a wash at a laundry it had a four-centimetre difference between its diagonals. She blamed the laundry. The laundry was only partly to blame – they’d washed it too hot and dried it on a line, which didn’t help – but most of that shape had been waiting inside the rug since the day she bought it.

I think dealers who sell a stretched kilim should tell the buyer it will move the first time it’s washed. Hardly any do.

How Should a Kilim Be Washed to Keep Its Shape?

Cold, and measured from start to finish.

Everything starts with the numbers. We measure all four sides and both diagonals and photograph the rug laid flat on the workshop floor. Old repairs and weak slits get noted on the job sheet. Then we check the fringe to see what the warps are made of, since that tells us how much movement to expect.

Next, a dye test. Many Turkish kilims carry strong reds and oranges, and on some modern pieces those dyes aren’t stable. A damp white cloth pressed hard on each colour for a minute will show whether any comes away. If it does, the wash changes completely, with a shorter contact time and a dye-fixing acid rinse ready.

Before any water goes on, dry soil comes out. A kilim holds a surprising amount of grit between its tightly packed wefts, and wet grit becomes mud. We dust it from the back on a vibrating dusting machine or by beating it on a frame, then vacuum both sides.

The wash itself is done flat on the workshop floor, with cool water and a gentle wool detergent, worked in with soft brushes along the direction of the warps. Agitation is kept to a minimum, because wool fibres that are rubbed hard while wet start to felt and tighten, and felting can’t be undone. The rinse is thorough, with a mild acid rinse at the end to leave the wool slightly acidic and help hold any unstable dye.

Then the water comes out as quickly as possible. A kilim left heavy with water for hours gives its warps time to shrink. We use a squeegee and a wet vacuum across the whole surface, sometimes a rug centrifuge for a sturdy piece, to take it from soaking to barely damp within minutes.

On a job for a customer in Stoke Newington, a two-and-a-half-metre Konya kilim with cotton warps came off the wash floor three centimetres shorter than its original length. After blocking and drying it was eight millimetres shorter, and square to within half a centimetre across the diagonals.

Blocking a Kilim While It Dries

Blocking is how that length gets back. The damp kilim is laid on a board or a clean floor and gently eased back towards its measured dimensions, a few millimetres at a time, working out from the centre. It’s then held there with rust-proof stainless pins or weights along the edges while it dries, with air movers running across it so it dries within hours. We check the diagonals several times as it goes, and nudge the pins when one corner starts to creep.

If anything, blocking takes longer than the wash itself.

Can a Shrunken Kilim Be Stretched Back?

Partly, and it depends on how much it moved and how old it is.

A kilim that came back a few centimetres short from a careless wash can usually be rewet, blocked and dried back to within a centimetre or two of its original size. The cotton warps haven’t been damaged. They’ve only contracted, and controlled tension while drying will lengthen them again.

What can’t be recovered is felting. A kilim that was scrubbed hard or put through a washing machine has wefts that have locked together, and no amount of pinning will open them back up. The rug feels thicker and stiffer, and the pattern looks slightly blurred at the edges of each colour.

If you’re already in dispute with a previous cleaner, the recovery is worth attempting before anyone talks about compensation. A kilim that has been blocked back to within a centimetre of its old size is a much smaller grievance than one lying crooked on the floor, and if anything, cleaners are more willing to pay for a re-block than to argue about what size the rug used to be. Bring the receipt from the dealer if you still have it. Many list dimensions, and those are the nearest thing to the six numbers most people never wrote down. They’re rarely exact, since dealers round to the nearest five centimetres, but a dealer’s receipt beats memory.

When the Slits Start to Open

Most Anatolian kilims are woven with slits where two colours meet in a vertical line, and those slits are the weak points. Stretch an old kilim too hard and the slits open into gaps, sometimes tearing along the length. On anything with visible age, we’d rather leave a rug a centimetre short and irregular than risk splitting it to make the numbers match. Any gaps that appear during blocking need hand-stitching before the kilim goes home.

Does Every Kilim Need Washing?

Far less often than people think.

A kilim on a living room floor in a house without dogs or small children can often go ten years between full washes. Regular vacuuming on both sides and a gentle beating in the garden once a year do most of the work. Fresh spills can be blotted and spot cleaned where they happen.

Full immersion washing is for a kilim that’s heavily soiled or has been flooded. For one that just looks a bit dull, I tell the customer to take it outside, hang it over a washing line on a dry day, and give it a good beating with a carpet beater. They’re generally surprised how much comes out.

A Check Before You Book

Look at the fringe. If the warps are bright white and slightly shiny, they’re almost certainly cotton, and you should ask the cleaner exactly how they plan to control shrinkage. If the warps are off-white or goat-hair grey, the kilim should move less.

A customer in Richmond did this with his hallway kilim and rang back to cancel. It had grey goat-hair warps, a slight lean to the left, and forty years of beating on a washing line behind it.

Truck-Mount or Portable? Cleaning a Fifth-Floor Flat in a Maida Vale Mansion Block

Portable.

That was my answer to a woman who rang from a flat on Elgin Avenue with a question she’d clearly rehearsed. She had read that truck-mounted machines clean better, she wanted a truck-mount, and she wanted to know if we had one. We do. It’s a good machine, and it cost more than my first house deposit. It stayed at the depot, and her carpets came out clean.

The rest of this is why.

What Does a Truck-Mounted Carpet Cleaner Do Better?

On paper, almost everything.

A truck-mount is a cleaning plant bolted into the back of a van, with its own engine driving the vacuum blower and pump, and heat taken off that engine to warm the water. It heats water hotter and more consistently than anything that plugs into a wall socket, and its blower moves far more air than the vacuum motors in a portable machine. The waste goes into a tank in the van, so nothing gets tipped down a customer’s toilet, and it draws no electricity from the property.

On a large, heavily soiled ground floor with somewhere to park close by, a truck-mount is the best tool in the trade, and I wouldn’t argue otherwise. A four-bedroom house in Southgate with the van on the drive and twenty metres of hose to the furthest bedroom is what these machines were built for.

Why Heat and Airflow Matter to Drying

Hotter water loosens oily soil faster and needs less detergent to do it. Stronger airflow pulls more of that water back out of the carpet on each pass. The combination means a truck-mounted clean usually leaves the pile drier than a portable does, and a drier carpet is ready to walk on sooner and less likely to wick soil back to the surface. That advantage is real. It depends entirely on the machine being close enough to the carpet to deliver it.

What Happens to a Truck-Mount’s Performance Over a Long Hose Run?

It drops away, and faster than most customers expect.

Every metre of vacuum hose adds friction to the airflow. Every metre of solution hose sheds heat into whatever it’s lying on – a cold marble stair, a draughty communal corridor, the pavement in January. The machine at the kerb might be producing water well above ninety degrees and a vacuum strong enough to lift a doormat, but what arrives at the wand after a long run is lukewarm water and suction that feels like a decent domestic vacuum on a bad day.

Manufacturers publish hose length limits, and most operators work well inside them for good reason. Past a certain point you’re dragging hose for the sake of saying the truck-mount did the job.

Now take the Elgin Avenue flat. An Edwardian mansion block, fifth floor, with the flat’s front door at the far end of a long corridor and the living room at the far end of the flat. From the nearest parking to the living room is roughly sixty metres of hose route, and that route runs up a stone staircase that turns back on itself ten times. You can’t run hose up a lift shaft, and the lift in that block is an original cage lift about the size of a phone box.

So the hose goes up the stairs. It lies across five half-landings and every step in between. Residents coming down with shopping step over it, and the communal stair runner needs protecting underneath it. The porter has to agree to all of this, and on a Saturday morning the porter isn’t there.

I learned the lesson years ago in a block off Kilburn High Road, four floors up, when I was younger and more stubborn about the van. We ran the hose up the stairwell, propped nothing, and lost most of an hour to a dog and a pushchair. The wand at the far end felt weak, the water was barely warm, and the carpet took until the next morning to dry – longer than a portable would have left it. As a rule, the machine at the kerb loses the argument somewhere around the third floor. I cleaned the last bedroom with the hose kinked round a door frame and the customer holding it straight for me, which is not something anybody should be paying for.

There’s a smaller cost that customers never see. Hose dragged over worn stone steps scuffs, and a hose dragged over a painted stair edge in a freshly decorated common part marks it. The managing agent sends the bill to the leaseholder who booked us.

The Fire Door Problem

Mansion blocks and converted buildings have fire doors on staircases and between corridors, and they’re there to hold smoke back long enough for people to get out. A hose run through a block means those doors have to stay open, which means propping them, which no managing agent should permit and most won’t. A door closed on a vacuum hose crushes it and kills the suction anyway.

This alone rules a truck-mount out in most of the mansion blocks I work in. The hose has no safe route to the flat.

Can You Park a Van Outside a Maida Vale Mansion Block?

Sometimes, with notice and a cost.

Maida Vale sits under Westminster’s controlled parking, and the streets of mansion blocks around Elgin Avenue and Randolph Avenue are lined with residents’ bays. Trade vans can use pay-by-phone bays where there are any, for limited periods, but a truck-mount has to park within hose reach of the entrance and stay there for the length of the job. That usually means applying to the council for a bay suspension, which takes days of notice and adds a fee to the job that the customer ends up paying.

The main road itself carries heavy traffic and waiting restrictions, and stopping there for three hours with hoses crossing the pavement isn’t an option. Even with a suspension granted, there’s no guarantee the bay will be empty when you arrive. A car parked there before the signs went up tends to stay put for the morning.

Running an Engine Under Somebody’s Window

A truck-mount’s engine runs for the whole clean. In a quiet residential street lined with bedroom windows three storeys up, that’s a long morning of engine noise and exhaust for everybody in the block, most of whom didn’t book a carpet clean. Councils in central London take engine idling seriously, and while a cleaning plant isn’t the same as a van idling at the lights, a resident who complains won’t be interested in the distinction.

How Good Is a Portable Machine in a Mansion Block Flat?

Good enough, if it’s a proper one and the person using it knows what they’re doing.

A professional portable extractor is a very different thing from a supermarket rental. The machines we take into flats have twin vacuum motors and an in-line heater, and the pump delivers real pressure at the wand. They fit in the cage lift. They go up and down in ten minutes, and nothing crosses a single communal space.

Power is the first thing to check. As a rule, a portable with heater and twin motors needs two separate circuits so it doesn’t trip the flat’s electrics, and some mansion block flats still have old wiring where two sockets in the same room share a circuit. We ask to see the consumer unit before we plug in, and we’ll run one lead from the kitchen and one from a bedroom.

Water comes from the kitchen tap, heated in the machine. Waste goes into the recovery tank and is emptied down the toilet, with the customer’s agreement, several times over the job.

The Elgin Avenue flat had a wool-rich Wilton in the living room and a cheaper twist in two bedrooms. We pre-sprayed and agitated with a brush, gave the heater time to reach temperature, and made slower, overlapping passes than a truck-mount would need, with extra dry passes at the end to take up more water. Then two air movers and the sash windows open a few inches. The living room was dry enough to walk on by mid-afternoon.

What a Portable Can’t Match

A portable is slower. On a very greasy, very neglected carpet it can’t match the heat of a truck-mount, and it leaves the carpet slightly wetter, so drying equipment isn’t optional. On a large flat with heavily soiled carpets, a portable job can take most of a day where a truck-mount would take half. As a rule I tell customers to expect a longer visit and plan for it.

Is Running Hoses Up the Outside of the Building Ever Acceptable?

Some firms get round the stairwell problem by lowering hoses out of a window to the van below. I think that’s unacceptable in a mansion block, and I’d say so to the firm doing it.

Five storeys of hose hanging down a brick facade has a lot of weight in it, especially the vacuum line full of dirty water, and it’s tied off to a sash window frame that may be a hundred years old. It passes the windows of four other flats. It crosses the pavement at the bottom where people walk with pushchairs. If a fitting fails, a stream of hot, dirty water comes down the front of the building. Most managing agents would never agree to it, and the ones who don’t find out until afterwards tend to take it up with the leaseholder.

The Question to Ask the Managing Agent First

Before booking any carpet cleaning in a block, ask the managing agent or porter what the building’s rules are for contractors: access times, use of the lift, where the van can stop, and whether any machinery is permitted in the common parts. In a Barbican tower or a new-build development with a concierge, you’ll often get a written contractor pack. In an older block in Maida Vale, you’ll more likely get a phone number for a porter who works weekdays until four.

His name is written on a card in the entrance lobby, in pencil, beside the lift button.

Rust Rings Under the Furniture Feet After a Carpet Clean – Whose Fault Is It and Does It Come Out?

If your carpet was cleaned yesterday and there are orange rings under the dining chairs this morning, the most likely culprit is the person who cleaned it.

I say that as a carpet cleaner. Rust rings are one of the few problems in this trade with a simple, preventable cause, and when they turn up the day after a clean, somebody skipped a step. Usually it was us. Occasionally it was the customer, and occasionally it was a nail nobody could have seen. The good news is that fresh rust on most carpets comes out, provided nobody reaches for the lemon juice first.

Why Does Rust Appear Under Furniture After a Carpet Is Cleaned?

Steel plus water plus air makes rust, and a freshly cleaned carpet supplies the water.

A carpet after hot water extraction holds its dampness in the pile for several hours. Put a steel chair glide, a bed frame foot or the axle housing of a castor onto it, and the thin layer of moisture trapped between metal and fibre starts working on the steel within a couple of hours. Iron oxide forms on the metal and dissolves into the damp pile beneath it. By morning there’s a crisp orange circle or square exactly the shape of the foot.

It doesn’t take much metal. The worst offenders are cheap pressed-steel glides on dining chairs and bar stools, where the chrome plating has worn through on the underside and nobody has ever looked. Old castors on armchairs are close behind, along with the square feet of metal bed frames, which carry a lot of weight and press hard into a damp pile.

In fairness, stainless steel and aluminium feet rarely cause it. It’s the plated and painted mild steel.

Is It Rust or Something Else?

Not every ring under a foot is rust, and the treatment differs.

Rust is orange to reddish-brown, with a sharp edge that matches the metal exactly. A brown or reddish blotch under a wooden leg is more likely wood stain or tannin from the timber bleeding into the damp pile, often softer at the edges. A green or blue-green mark means brass or copper, usually from an old brass castor. Each of those needs a different spotter. So the first thing we do is lift the chair and look at the foot.

Whose Fault Is a Rust Ring After a Carpet Clean?

Most of the time, the cleaner’s.

Any competent carpet cleaner knows that metal and damp carpet don’t mix. Standard practice is to lift every piece of furniture that stays in the room and set its feet on plastic or foam blocks, or on protective tabs, until the carpet is fully dry. If the chairs went back down onto bare damp carpet and rings appeared overnight, that step was missed, and the cleaner should come back and remove the rust at no charge. I’d say the same whether the cleaner was us or someone else. A reputable firm won’t argue.

If it was another company, ring them the same morning and send photographs, taken in daylight with the chair lifted and moved to one side so the ring is clear. Ask them to come back and treat it, and don’t try anything yourself in the meantime. A fresh ring is far easier for them to remove than one that has had a day of home remedies on it, and anything you put on it gives them a reason to say the damage is no longer theirs. In fairness, most firms respond quickly to this, because rust rings are embarrassing and they know exactly what went wrong. The ones that don’t respond are worth a short, polite email that mentions the blocks they didn’t use.

There’s a grey area when blocks were used and still failed. A block can get kicked out from under a chair leg by a child or a dog, and a foam block left under a heavy wardrobe for a week can itself compress and let the foot touch the carpet. In fairness to cleaners, those rings are nobody’s fault in particular. We’d still come back.

When the Customer Moved the Furniture Back

Customers get told to leave the blocks in place until the carpet is dry, which for most domestic cleans means somewhere between four and eight hours, longer in a cold room in January. A lot of customers take them out the same evening because they want to sit down for dinner.

On a job in Walthamstow, a couple had their living room and dining room cleaned on a Friday morning, and I left thirty-odd blocks under a dining set and a sofa. They had friends round that night and put the chairs back at six. The rings were there on Saturday. We removed them anyway, because arguing about blame over eight chair feet costs more goodwill than the chemicals do, but the job sheet made clear we’d told them.

How Do Professionals Remove Rust From Carpet?

Carefully, with acid, in small amounts.

Rust is iron oxide, and iron oxide dissolves in the right kind of mild acid. The standard trade rust remover for carpet is based on oxalic acid, sometimes with other organic acids, and it works by binding the iron and pulling it back into solution so it can be rinsed out. It’s gentle enough for wool, which is a protein fibre and tolerates mild acidity well, and for most nylon and polypropylene.

We start by checking the fibre and doing a test on a hidden area, because some acid-dyed nylons can shift colour slightly under acid spotters. Then the spotter goes onto the ring with a small applicator bottle, just enough to wet the orange and nothing around it. It needs a few minutes. We work it gently with the edge of a tamping brush, tapping straight down into the pile. Rubbing only spreads the orange outwards. On a fresh ring from the night before, the colour often starts to fade within a minute and disappears within five.

Then comes the part that gets skipped. Oxalic acid left in a carpet attracts soil and, on some carpets, can cause yellowing over time. Every spot we treat gets a thorough rinse with clean water through an extraction tool, and a second rinse on wool. We blot almost dry, groom the pile upright and, this time, keep the chair off it.

Older rust is harder. A ring that has sat for months, walked on and vacuumed, has had time to bond more firmly with the fibre and usually needs several applications, with rinsing between each. On a stair carpet in Chiswick we took a rust mark from an old metal stair rod clip down to a faint shadow over three applications, and it never went completely.

There are stronger rust removers on the trade market based on fluoride compounds. They work faster and they’re dangerous – they can cause serious burns that don’t hurt straight away – and I won’t use them in someone’s living room. Oxalic acid takes longer. It’s the right tool for a house with children in it.

Why Lemon Juice and Salt Is Bad Advice

Search online for rust on carpet and you’ll find lemon juice and salt recommended everywhere. It’s the worst suggestion on the list.

Lemon juice contains citric acid, which is far weaker against rust than oxalic acid, so people use a lot of it and leave it on for hours. The salt serves little purpose beyond acting as an abrasive, and once the carpet dries it leaves a residue of salt in the pile that pulls moisture out of the air and attracts dirt. A customer in Bromley did this to a pale grey wool twist and ended up with the rust faded, but a sticky, grubby circle three times the size of the ring. That second stain took us longer than the rust would have.

Can Rust Come Up From Under the Carpet?

Yes, and it’s the reason a well-blocked job can still show orange.

A carpet is held down at its edges by gripper strips, wooden battens with angled steel pins. Older gripper, especially in Victorian and Edwardian houses that have had carpet laid over it more than once, often has rusty pins. Doorways sometimes hide old steel threshold bars under the pile, and stair carpets can conceal decades-old stair rod fixings and upholstery tacks.

If a carpet is overwetted during cleaning, water runs down through the backing to those metal parts and carries rust back up as it wicks towards the surface while drying.

The Line Along the Skirting

Rust from gripper shows as a thin, broken orange line a few centimetres out from the skirting board, running along one or more walls. In a doorway it’s a straight bar across the threshold. Those marks point to too much water put down along the edges of the room, which is a cleaning fault, and they’re treated the same way as a ring, with the same rinse. If the gripper is badly corroded the rust will return every time the edge gets wet, and the honest advice is to have a fitter replace that length of gripper.

How Should a Carpet Cleaner Protect Against Rust?

Blocks under every metal foot, without exception, and tabs under every wooden one.

Before a machine goes on, the cleaner should walk the room with the customer and lift the chairs to look underneath. Moisture control matters as much as blocks: a carpet cleaned with the right amount of water and dried with air movers is dry enough to walk on within a few hours, which shrinks the window in which rust can form. The cleaner should tell the customer how long to wait, and write it down.

A Note on the Job Sheet

Our job sheets have a line for the number of blocks left in the room and the time the customer was told to leave them until. It saves arguments.

The Walthamstow sheet says thirty-two blocks, dry by 4pm, and the customer’s signature is in green biro.

Why Do Orange-Grey Mud Stains From London Clay Get Worse When You Scrub Them?

“It was the size of a boot print when I started. Now it’s the size of a tea tray.”

She was standing in a hallway on the slope below Harrow on the Hill, holding a scrubbing brush and a bottle of washing-up liquid, and she was right about the tea tray. Her son had come in from rugby practice, walked the length of a cream wool runner in his boots, and she had spent forty minutes making it worse with every stroke.

Nothing she did was unusual. It’s what almost everyone does with mud, and London mud punishes it.

What Makes London Clay Different From Ordinary Garden Soil?

Most of London sits on a thick bed of clay laid down in a warm sea tens of millions of years ago. Dig a spade’s depth into a garden in Forest Hill or Highgate and you’ll hit it – dense, sticky, and heavy enough to pull a wellington off.

Particle size is the problem. Sand grains are big enough to see. Silt is finer. Clay particles are finer again, most of them under two thousandths of a millimetre across, flat and plate-shaped, and they carry an electrical charge on their surfaces that makes them stick to one another and to almost anything else. Some of the minerals in London Clay swell when they take on water, which is the same property that cracks house foundations in a dry summer and heaves them back in a wet winter.

On a carpet, all of that means one thing. Wet clay is a paste made of particles small enough to slip between the individual scales of a wool fibre, and sticky enough to stay there.

Why the Colour Changes as It Dries

Fresh from deep in the ground, London Clay is blue-grey. Near the surface, where air and water have worked on it, the iron in it has oxidised to orange and brown, and garden and allotment soil is usually a mixture of the two.

Wet, the mark looks dark and muddy brown. Dry, it goes paler and more orange, with a grey haze around the edges. People see the stain lighten and change colour overnight and assume it has spread. By and large it hasn’t. It has only shown its true colour.

What Does Scrubbing Wet Clay Do to a Carpet?

It turns a lump into a liquid.

A clump of mud on the pile is mostly sitting on the tips of the tufts. Add water and agitation, and the clay breaks down into a thin suspension – muddy water, in effect – which runs down the yarn to the base of the pile and outwards through the backing, carrying colour with it. Every stroke of the brush drives more of it down and pushes the edge of the mark wider.

Washing-up liquid speeds that up. Detergent is designed to keep fine particles suspended in water so they don’t settle back onto your plates, and it does the same thing with clay, holding it in suspension long enough to travel further through the carpet before it dries.

Then it dries in the base of the pile, well out of reach of a vacuum, as a pale orange ring with a darker centre.

The Rented Carpet Shampooer Makes It Worse Again

The second instinct, after the brush, is the machine from the supermarket. Those machines put a great deal of water down and recover a fraction of it, and on a clay stain that’s the worst possible combination. The Harrow runner had already had one. Its underlay was damp a day later, and the orange had crept under the edge of the skirting.

How Should Clay Mud Come Out of a Carpet?

Leave it alone until it’s bone dry.

It’s also the hardest instruction to follow, because nobody likes walking past a lump of mud in the hall for a day. Dry clay is brittle. Dry clay crumbles. The same particles that bond into a paste when wet will break apart into dust once the water has gone, and dust can be lifted out of a carpet from the top.

Give it twenty-four hours, longer in a cold house in winter. Don’t cover it with a towel, which slows drying and wicks the colour upwards. A fan helps. A hairdryer doesn’t, because it tends to crust the surface while the base of the lump stays damp.

Once it’s dry, break it up. The back of a spoon or a blunt butter knife, pressed down and rocked gently, cracks the lump into crumbs without grinding them into the pile. Then a stiff, dry brush, flicking the crumbs upwards and out towards you. Then the vacuum, slowly, with several overlapping passes in different directions. On a synthetic carpet the beater bar helps here. On a wool twist or anything loop pile I’d use suction only, with the brush roll switched off, to avoid fuzzing the yarn.

Repeat the brushing and vacuuming two or three times. A lot of people stop after one round, see an orange shadow, and reach for water. The second and third rounds by and large take out more than the first did.

When we’re called in, we do the same thing with better tools. A pile lifter or a counter-rotating brush machine loosens dry soil from the base of the tufts, and a commercial vacuum with strong airflow pulls it out. On a job off Honor Oak Road in Forest Hill, a family had walked allotment mud down a stair runner in wellingtons for a whole wet autumn, and we took two full canisters of dry soil out of eleven stairs before any liquid touched the carpet. The customer kept one of the canisters to show her husband.

If the scrubbing has already happened, stop and switch to damage limitation. Fold a thick, clean bath towel into quarters, lay it over the wet area and stand on it, moving your weight around, then swap to a dry towel and do it again until the towels come up barely damp. Don’t pour on more water to rinse it through. The goal now is to get the clay-laden water out of the carpet before it reaches the underlay, and every minute it spends soaking downwards makes the ring bigger. Then open a window, put a fan on it, and walk away for a day and a half. What’s left will be a flatter, wider stain than the lump you started with, but a dry one, and a surprising amount of it still comes out with the brush and vacuum once it has dried through.

What Stays Behind in the Base of the Pile

After thorough dry removal there’s often a faint orange cast left. That’s iron oxide staining the fibre itself, and no amount of vacuuming shifts it.

That part needs a controlled wet clean – a very small amount of cleaning solution worked in with a towel or a gentle brush, then extracted, keeping moisture high in the pile so nothing reaches the backing. On a stubborn orange tint we’ll test a mild acidic rust and tannin spotter on a hidden area first, since iron staining responds to acidity far better than to detergent, and wool tolerates that kind of chemistry well. We finish with a rinse and dry it fast with air movers.

Which Carpets Show Clay Mud the Worst?

Pale wool twists and Saxonies show it most, because orange on cream is the least forgiving colour combination a hallway can have.

Grey and taupe polypropylene hides it well enough that people don’t notice the build-up until the carpet is lifted. Loop piles trap crumbs of dried clay inside the loops, where a vacuum struggles to reach. Deep shag piles swallow whole lumps.

The Hallway Runner Problem

Runners suffer most, and it’s down to geometry. A runner on a hall floor takes every footstep in a strip less than a metre wide, and on a stair runner each tread takes the full weight of a boot at the same point on the nosing, grinding the clay in. A family home with a garden door at the back will usually show a trail that fades in steps from the kitchen towards the stairs. The first three or four metres inside that door carry nearly all of the clay, and they’re the metres people clean least, because the back hall is where the recycling bins and the school bags live and nobody moves them to vacuum.

Is It Worth Paying a Professional to Clean Clay Mud?

Usually not, if you catch it right.

A single trodden boot print on a carpet, left to dry and patiently brushed and vacuumed, comes out at home in the vast majority of cases. I’d much rather a customer spent twenty minutes with a spoon and a vacuum than paid our minimum charge for the same result. Call someone in when an orange stain survives proper dry removal, or when someone has already scrubbed it and the mark is now the size of a tea tray.

The Harrow runner came back to a pale, even cream. It took us two visits, a week apart, because the underlay needed that week to dry out between them.

The unpopular part: stain protector treatments are oversold for mud. Protectors help a carpet shed liquid spills like tea or wine, where they slow absorption. Clay is a particle, and those treatments do little to stop a gritty paste being ground in by a boot. By and large, customers who pay extra for protection in a family hallway would get more for their money from a rough coir mat outside and a boot rack on the step.

The Boot Scraper by the Back Door

Mud comes into London houses through the back door far more often than the front, because that’s where the garden is. A cast iron boot scraper, fixed into the ground beside the step, removes the bulk of clay from the tread before a single boot crosses the threshold. They cost less than one of our call-outs.

The one in Forest Hill is shaped like a hedgehog, and it’s full of clay.

Can Dried Emulsion Paint Come Out of a Wool Carpet After the Decorators Have Gone?

A dried drip of emulsion in a wool twist feels like a crumb of toast under a bare foot. You don’t see it first. You feel it, halfway down the landing at seven in the morning, and then you kneel and find eleven more.

That was a terrace off Fortis Green in Muswell Hill. Oatmeal wool twist on the stairs and landing, a hallway freshly painted in a dark sage the owner had spent a month choosing, and a decorator who had finished on the Friday, been paid, and gone to Tenerife. Most of it came out. Two spots on the top step did not, and she still knows exactly where they are.

What Happens to Emulsion as It Dries in a Wool Pile?

Emulsion is water carrying tiny particles of acrylic or vinyl polymer, plus pigment. While the water is still there, it behaves like a thin, dirty liquid and will rinse. As the water evaporates, those polymer particles are pressed together until they merge into a continuous plastic film.

Once that has happened, water can’t pull them apart again. This is the whole reason the paint stays on your wall through a decade of hands and radiators.

Touch-dry is an hour or two. The film keeps hardening for weeks after that, and a drip found a fortnight after the decorators left is a harder job than one found after two days, and a much harder job than one found while the brush was still wet. Wool makes it trickier still. The fibre has a scaly surface that paint grips, and wool drinks water, so a fresh drop doesn’t sit on the tips for long – it wicks down the yarn and dries partly inside it.

The First Day Is a Different Job

If the paint is still wet, scoop what’s standing with a spoon or a plastic card, then blot with a cloth dampened in cold water, working inwards and swapping to a clean section of cloth as often as not. Don’t rub. Rubbing a wet drip into a twist pile spreads it across three tufts where there was one.

That’s a ten-minute job, and nobody needs to ring anyone.

Where Does Decorating Paint Usually End Up on a Carpet?

The skirting line, mostly. A brush cutting in along the top of a skirting board flicks drips outwards, and the first forty centimetres of carpet takes them.

Doorways come next, because that’s where people set trays down and where rollers get reloaded. Then there’s the trodden drip – one spot stepped in and carried along as a trail of fainter footprints, usually towards wherever the kettle is.

Mist Coat Spatter Is the One People Miss

New plaster gets a mist coat, which is emulsion thinned with water so the plaster can soak it up. A roller loaded with mist coat throws a fine spray of droplets far wider than a normal coat does, and on a pale carpet the result is a haze of tiny dots within about a metre of the wall. In electric light you’ll barely see them. Open the curtains on a bright morning and the whole margin of the room looks faintly freckled. Thinned paint also soaks deeper into the yarn before it dries, which makes it harder to lift than a fat drip.

How Do We Remove Cured Emulsion From a Wool Carpet?

First, we find out where the paint sits. Parting the pile around a spot shows whether it’s a blob riding on the tips of the tufts or a stain that has run to the base of the yarn. Those are two different jobs, and the second takes three times as long.

Then a colourfastness test on a hidden area, because the softening agents that work on paint can also shift a dye that hasn’t been fixed well. Behind a door, or at the back of a wardrobe floor.

The removal itself is slow. We apply a paint and ink remover based on glycol ethers – solvents that swell and soften an acrylic film without the harsh alkalis wool can’t tolerate – in tiny amounts, with a pipette or a cotton bud, onto the paint and nowhere else. It needs a few minutes to dwell. Once the film softens, a blunt bone spatula or the back of a tamping brush breaks it into flakes, and those flakes lift out of the pile with tweezers or a crevice tool on the vacuum. As often as not the first application gets a third of it. Then we repeat, sometimes four or five times on a single spot, until nothing is left to soften.

Wool is a protein fibre and prefers slightly acidic conditions, so the area gets a mild acid rinse afterwards to take out solvent residue and bring the pH back down. We blot it almost dry and groom the pile upright by hand.

A single raised drip takes around twenty minutes. The landing in Muswell Hill had twelve, plus a trodden trail, and it took most of an afternoon.

Things we don’t use: DIY paint stripper from the hardware shop, which is formulated for wood and metal and will strip a wool fibre as happily as a door; acetone, which can damage the latex holding the tufts to the backing; and any kind of heat, which softens paint only by softening the carpet around it.

When the Paint Has Soaked Down to the Backing

A knocked-over tray is a separate problem. Paint that has run down into the base of the pile and pooled on the backing can’t be softened properly without soaking the carpet so heavily that you risk the backing and the underlay, and the solvent needs to touch the paint to work. We can lighten the surface. The base stays painted, and it shows as a darker, stiffer patch that crunches when you tread on it.

On a spill that size the realistic options are a patch or learning to live with it.

When Is Trimming the Pile Better Than Chemistry?

More often than the trade likes to admit, and this is the part I’d tell any customer before they book.

A raised drip sitting on the tips of a cut-pile twist or Saxony can often be cut out. Small curved nail scissors, the pile held upright between finger and thumb, and a snip just beneath the paint. On a carpet with a pile ten millimetres deep or more, losing two millimetres from a handful of tufts is invisible once you’ve brushed the neighbouring pile across it. You can do six drips yourself in the time it takes to find a contractor’s number, and you’ll save the call-out.

It doesn’t work everywhere. A short velvet pile or a Wilton with a clipped, even surface shows every cut, and on loop pile you’re cutting through loops that then unravel. On those, leave the scissors in the drawer.

It also doesn’t work on mist coat spatter – there are too many dots and they sit too low.

Patching a Doorway

A tray set down on a threshold usually leaves a stain a hand’s width across, right where every pair of feet in the house crosses it. Chemistry won’t get the base of that. A patch will. A good fitter cuts a matching piece from an offcut or from carpet inside a built-in wardrobe, lines up the pile direction and bonds it in, and in a doorway the join often hides under the threshold strip. On a job in Blackheath, SE3, a patch on a bedroom threshold cost the owner less than my quote for trying to clean it, so I told her to ring the fitter.

Should the Decorator Pay for Paint on the Carpet?

Yes, in my view, and I’d raise it before settling the invoice rather than after.

Protecting the floor is part of decorating. A decorator who leaves drips in a finished carpet has done the job badly, and most will come back and deal with it if asked promptly and politely. Many carry public liability insurance that covers this kind of damage, although a few spots rarely makes a claim worth anyone’s time.

Here’s the opinion that gets me into arguments with decorators. Plastic sheeting laid over carpet is lazy protection, and I’d rather see a floor covered with old bed sheets than with polythene. Paint beads on plastic instead of soaking in, so a drip stays wet, gets stepped in and walked off the edge onto the carpet. Polythene slides underfoot on a stair, too. A heavy cotton twill dust sheet absorbs the drip where it lands and stays put. Decorators like polythene because it’s cheap and they can bin it at the end of the day.

Photographs Before the Dust Sheets Come Up

Take pictures of the carpet before any work starts, and again when the sheets are lifted, with the decorator still in the room. Daylight, phone held low so the pile throws a shadow. A customer in Kingston upon Thames had both sets and got her money back for the cleaning without a single awkward phone call.

Her decorator now puts a note about floor protection on his quotes. He showed me one – it’s the line just below the VAT.

a standard mid-sized London office

Printer Toner Spilt on the Office Carpet: Why Hot Water Is the One Thing You Mustn’t Use

The call came in at twenty to eight on a Tuesday. A building manager on Clerkenwell Road, EC1M, whose night cleaner had knocked a full waste toner bottle off the back of the multifunction printer by the second-floor lifts.

“It’s fine,” he said. “She’s already had the wet vac on it.”

She had filled the machine from the hot tap in the cleaners’ cupboard, and by the time we arrived there was a grey smear three metres long running from the printer towards the kitchen, with a darker core where she had gone over it twice. We saved about a third of what she’d touched. The rest went into a skip on Farringdon Road.

What Happens to Toner When It Meets Hot Water?

Toner is plastic. People picture it as ink in powder form, and that picture sends them straight to the kitchen tap.

Each particle is a speck of resin – usually a styrene-acrylic or polyester polymer – carrying pigment and a little wax, somewhere around five to ten microns across. The printer’s fuser presses it onto paper at high temperature, but the resin starts to soften far lower than that, in the region of fifty to sixty-odd degrees Celsius depending on the formulation. A portable extraction machine with an inline heater delivers water close to that range. A truck-mount will put it through the carpet hotter still.

So a hot water extraction clean on a toner spill is, in effect, a very slow and very wet fuser. The resin softens, wraps itself around the nylon fibres and cools there. What was loose powder an hour ago is now a thin plastic coating on thousands of tufts, and no rinse brings it back out.

Detergent makes it worse. Surfactants exist to break surface tension and carry soil downwards, and they do that job faithfully with toner, pulling particles past the tips and into the base of the pile, then into the tile backing.

Why Cold Water Is Barely Better as a First Move

Cold water won’t melt anything, and that’s the only thing going for it. Toner repels water until there’s enough agitation to force the two together, at which point you get a grey paste that behaves like fine silt – it wicks and spreads sideways, then dries into the pile as a stain instead of sitting on top as dust.

Water comes last, if at all.

What Should You Do in the First Hour After a Toner Spill?

Keep people off it. That sounds obvious until you watch a whole sales team step round a cone to get to the kettle and carry grey footprints down a corridor of charcoal-and-cream tiles.

Then hold back the cleaning trolley. The night team’s upright vacuum is the next thing most offices reach for, and for my money it does more damage than the spill itself. An ordinary bag vacuum isn’t built to hold particles that fine. They go through the bag and the filter and out of the exhaust, and the grey film that settles on desks and along the top edges of partition screens over the following hour is the same toner, redistributed across the floor plate. Fine toner dust is combustible in a dense enough cloud, too, and a brushed motor full of it is not where you want that cloud forming.

Check the floor grilles. A lot of Grade A space in London supplies air through a raised access floor, and a spill beside a floor diffuser can be in the plenum within minutes. Ask whoever runs the building to shut that zone down.

Open a window if the building has any that open. Whoever does the lifting should wear disposable gloves and a dust mask – toner is classed as a nuisance dust rather than anything exotic, but a morning of breathing it in off your knees at floor level is a morning nobody enjoys, and the grey gets into the creases of your knuckles for days.

After that, dry removal. Lift the heaped powder with a piece of stiff card, sliding it under the heap at a low angle and tipping it into a bag you can seal. Don’t brush. Toner is made to cling to anything carrying a charge – that’s how the printer drum picks it up – and brushing builds static, so a dustpan brush turns a neat heap into a wide grey halo. Leave everything the card can’t lift for someone with a toner vacuum, meaning a unit with HEPA-grade filtration and a conductive, earthed hose. Most managed print engineers carry one in the van, and buying one outright costs a few hundred pounds.

The Carpet Tile Advantage Nobody Uses

Most offices with this problem are standing on carpet tiles, and a tile can be lifted.

This is the step I’d push hardest, because it takes ten minutes and avoids most of what follows. Pull the affected tiles with a tile lifter or a flat screwdriver, keep them level so nothing slides off, and carry them outside. On a loading bay you can vacuum the backs properly and look at the face in daylight without dragging the surrounding floor into it. Swap in tiles from under a filing cabinet while they’re out. Nobody sees the join under a pedestal.

A council office in Croydon, CR0, did exactly this with four tiles by a print bay and rang us afterwards to ask whether they still needed a visit. They didn’t, and I told them so.

How Do Professionals Remove Toner From Carpet Fibres?

When we do attend, most of the job is the toner vacuum and patience.

Slow passes in several directions, with the pile lightly groomed between them so particles lodged at the base get lifted to where suction can reach. It is dull work. On a spill the size of a dinner tray it can take forty minutes before we open a bottle of anything.

Then a dry solvent spotter, applied to a white cloth and never poured onto the carpet, blotted and tamped with a soft brush. Volatile dry solvents loosen the waxy fraction of toner without introducing heat or water. We work from the outside of the mark inwards, change cloths constantly and keep rotary machines well away, because friction makes warmth.

Only after that, and only if a grey cast remains, does water go near it: a cold neutral rinse through the wand at room temperature, heater off, as few passes as the job allows.

Turning the Heater Off Is Harder Than It Sounds

A truck-mounted machine heats its water through a heat exchanger that stays hot long after you turn it down, and the solution hose running up from the van holds a warm slug of water for the first stretch of any job. On toner we either let the whole system cool completely or bring a portable with the element disconnected. For my money the portable is the right tool on every toner job, whatever the size of the building. On a sixth floor at Merchant Square, W2, the truck-mount sat in the car park all day and nobody touched it.

Can Toner That Has Already Melted Into the Carpet Be Removed?

Partly, sometimes.

Fused toner responds to repeated solvent work if the coating is thin, and solution-dyed nylon – which most commercial tiles are – tolerates that treatment far better than a wool-rich carpet would. The grey lightens. It rarely disappears. What usually remains is a flat, slightly darker area that shows as a shadow in raking light from a window and vanishes under the standard office downlights. On the Clerkenwell job the shadow became the whole argument. The tenant had eighteen months left on the lease and could live with it. The landlord’s surveyor, at the end of those eighteen months, would not.

Broadloom changes the maths. You can’t lift a section and swap it, and patching cut-pile commercial broadloom needs a matching offcut and a fitter who is good with a seam.

When Replacement Is Cheaper Than a Second Visit

If a first solvent attempt on fused toner hasn’t taken the colour back by at least half, I tell the client to stop paying us. A replacement tile from a current range costs a fraction of a second attendance, and a building that kept its attic stock – the spare boxes the fit-out contractor leaves in the plant room – can have the floor right by lunchtime.

Most buildings threw those boxes out years ago.

Who Should Be Responsible for Toner Spills in an Office?

The print provider, for my money.

Nearly every London office running a fleet of multifunction machines is on a managed print contract, and the engineer who changes the waste toner bottle is the person with the right vacuum and, often, a spill clause in the service agreement. Facilities managers ring the carpet cleaner out of habit. A call to the print helpdesk will frequently get an engineer out to clear the loose powder, and then the question of whether a contractor like us is needed at all becomes a much smaller one.

Carpet under a print station is a specification mistake, and interior designers keep making it. A multifunction printer sheds heat and paper dust all day, and every so often it sheds toner. It belongs on a hard floor bay or at the very least on a rigid mat of the kind that goes under an office chair. A forty-pound mat would have spared the tenant on Clerkenwell Road a morning’s disruption and a skip. Designers say a mat breaks up the look of the floor plate. It does. So does a grey smear three metres long.

A Laminated Card by the Machine

The cheapest fix is telling the night cleaners before it happens. Most spills are found out of hours by someone who has never been briefed about toner and has a wet vac and a hot tap within reach. A card on the printer saying no water, no ordinary vacuum, no brushing, then cone it off and ring the print helpdesk, covers most of it.

The one at Merchant Square is cable-tied to the side of the paper tray, just above the stapler.

Is Your Carpet Safe for Crawling Babies? Cleaning Tips for Parents

If only your little beetle bug would stay still for a moment… But it is not to be, so get the idea out of your head. Once your baby embarks on an around-the-house expedition that would shame Magellan and Drake, there is no stopping their adventurous zest. So, the only thing left is to make their crawling ground as safe as possible.

This article guides you through common contaminants in your carpet, practical cleaning tips, and safe products to ensure a healthy space for your child. Additionally, it explores professional cleaning options and considers alternative flooring solutions that prioritise safety and comfort.

Potential Harmful Substances

The Importance of a Clean Carpet for Crawling Babies

Keeping your carpet clean is important for creating a safe home environment, especially with little ones crawling around and exploring every nook and cranny. A tidy carpet helps protect your children from harmful allergens, bacteria, and toxins lurking in dirty carpets while boosting their overall health.

Regular carpet care improves indoor air quality, keeping dust mites and pet dander at bay, which is especially crucial for sensitive children. By prioritising carpet cleanliness, you are setting up a healthier space for your little ones to grow and thrive.

Health Risks of Dirty Carpets

Dirty carpets can be a hidden health hazard, especially for crawling babies and their developing immune systems.

When your little ones explore their surroundings by crawling or lying on the floor, they might unknowingly come into contact with some pretty sneaky dangers like bacteria and allergens. For example, unclean carpets can collect dust mites—those tiny critters that love to hang about in old carpet fibres. This can trigger asthma and allergy symptoms in sensitive children.

Moreover, if the carpets are damp, mould can grow, releasing spores that can cause respiratory issues. All these factors create an environment that might impact your child’s overall health, increasing the chances of respiratory infections or other illnesses.

Keeping those carpets clean is essential for protecting your little explorers as they play and discover their world.

Common Contaminants in Carpets

You might not realise it, but carpets can gather all sorts of common contaminants that can impact indoor air quality and your family’s health, especially if you have young children.

Think about it: pet dander, dust mites, and even toxic chemicals from cleaning products and spills can find a cosy home in your carpets. Not only do these nasties contribute to unpleasant odours, but they can also harbour bacteria that could be a real health risk for your family.

Potential Harmful Substances

You might not realise it, but your carpets could hide potentially harmful substances. The toxins from cleaning products can be especially concerning for babies who spend much time crawling around on those surfaces.

Many of these cleaning agents contain harsh chemicals like phthalates, volatile organic compounds (VOCs), and formaldehyde, which can easily seep into carpet fibres. These substances pose health risks to young children and can increase allergens in your home. Allergens like dust mites and pet dander tend to settle in carpets, which can exacerbate respiratory issues and allergies, especially for sensitive people.

Homeowners need to be aware of these potential hazards. Considering safer alternatives when choosing cleaning products can help create a healthier living space.

The Importance of a Clean Carpet for Crawling Babies

How to Keep Your Carpet Clean

Keeping your carpet clean requires consistent effort. You should use effective cleaning tips and routines that suit your home environment, especially with little ones crawling about.

Preventive Measures and Cleaning Tips

Implementing preventive measures can really reduce the need for serious cleaning, keeping your carpet safe and hygienic for your crawling little ones.

Establishing a regular cleaning routine, such as vacuuming several times a week, can help minimise the chances of dirt and allergens settling into the fibres. Using area rugs in high-traffic areas acts as a barrier, soaking up much of the dirt before it even reaches the carpet underneath.

If spills occur, it’s crucial to act quickly—blotting instead of rubbing helps lift stains without making matters worse. Selecting carpets with high absorbency can make managing those little accidents a breeze, keeping your space clean and inviting for your curious explorers.

Choosing Safe Cleaning Products

Choosing safe cleaning products is crucial for keeping your carpet clean and ensuring your little ones and family remain safe and healthy.

What to Look for and What to Avoid

Knowing what to look for and what to avoid when selecting cleaning products is extremely important for keeping children healthy and safe.

Choosing non-toxic cleaners can truly transform your home environment. These products typically don’t contain harsh chemicals that can trigger respiratory issues or allergic reactions, making them much safer for children who are more sensitive to these matters.

By opting for eco-friendly alternatives, you can create a home that promotes health instead of risking exposure to harmful substances. Remember, even surface cleaners can leave behind residues, which can unintentionally be ingested or absorbed through the skin during playtime or daily activities.

Keeping your children healthy begins with making informed choices, ensuring that each cleaning session enhances your family’s safety rather than compromising it.

Professional Carpet Cleaning

Consider professional carpet cleaning a fantastic option for keeping your space clean and well-maintained. This is especially important when you have crawling babies around, as it ensures a safe environment for them to explore.

Benefits and Considerations

The benefits of professional carpet cleaning go far beyond making your carpets look good; they also significantly contribute to keeping your home safe for your family.

When you choose professional services, you can seriously reduce health hazards such as dust mites, mould, and allergens that thrive in those deep, uncleaned fibres. Unlike DIY methods that might leave behind stubborn residues, professionals come equipped with advanced tools and cleaning solutions that effectively tackle these contaminants, creating a healthier environment for you and your loved ones.

These expert cleaners follow systematic routines tailored to your carpet’s needs, ensuring they do a more thorough job than standard home cleaning methods. This attention to detail brightens up your carpets and helps them last longer, making them more durable and resistant to wear over time.

Alternative Flooring Options for Babies

When considering flooring options for babies, consider alternatives to traditional carpets. Plenty of alternatives can provide better safety and comfort for your little ones as they crawl around.

Comparing Different Types of Flooring

When you compare different types of flooring, it’s extremely important to find the best fit for your home, especially if you have little ones crawling around.

There are various flooring options available, and each one has its own set of pros and cons, particularly regarding safety and comfort. Soft surfaces like carpets are excellent because they provide a cushioned landing, a real lifesaver for your active toddlers, helping prevent injuries from slips and falls. You can choose from several types of carpets, such as plush, Berber, and frieze, each offering unique textures and levels of comfort.

On the other hand, hard surfaces like tiles and hardwood look stylish and are easy to clean, but they can be slippery, especially when wet, which is something to keep in mind. So, you’ll want to balance the aesthetic appeal with practical concerns, ensuring your choices create a safe, child-friendly environment.

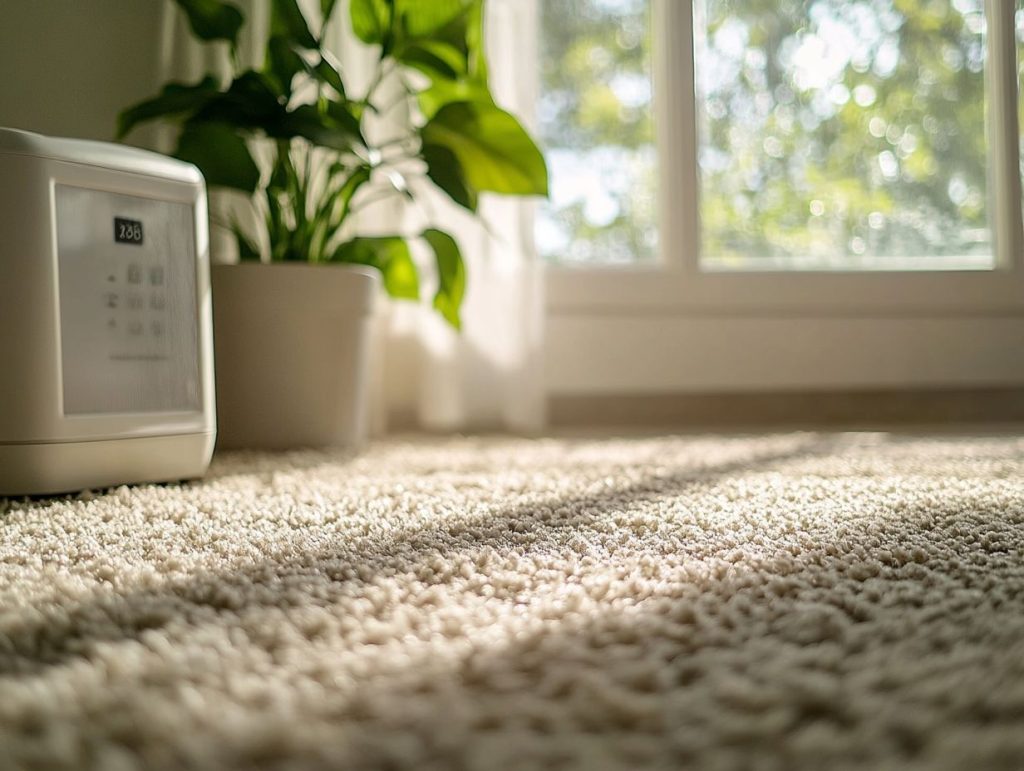
How to Fix Carpet Dents Left by Furniture: Easy Tricks to Try

Carpet dents can be frustrating, often caused by heavy furniture pressing down on your flooring over time. This article explains everything you need to know about carpet dents, from understanding what causes them and the various types you might encounter to practical tips for prevention and quick fixes.

Whether you’re looking for DIY methods or considering professional solutions, this guide has you covered. Plus, discover how to maintain a dent-free carpet to keep your home looking fresh and inviting.

Preventing Carpet Dents

Why Do Carpet Dents Occur?

Understanding carpet dents is key to keeping your carpets looking beautiful and lasting longer. Those annoying indentations, often caused by heavy furniture, can get under your skin when it comes to carpet care.

By identifying what causes these dents and the different types you might encounter, you can devise effective strategies to prevent and fix them. Whether dealing with furniture marks or other pressure marks, knowing how to tackle these issues can make a huge difference in how your carpet looks and feels.

What Causes Carpet Dents?

Carpet dents occur mainly because the weight of furniture and heavy objects presses down on the carpet fibres, causing temporary deformations and annoying pressure marks. This tends to be especially common in spots where furniture remains stationary for long periods, leading to a loss of the carpet’s bounce and texture. Understanding what causes these indentations can help you devise ways to prevent and rectify them.

The type and design of your furniture play a significant role, too. For example, bulky sofas or coffee tables with slender legs can create pinpoint pressure on the carpet, exacerbating those dents. Additionally, the quality and thickness of your carpet underlay are very important; thicker underlay can give it more cushioning and support, helping it bounce back from those imprints.

Regularly rearranging your furniture is an excellent way to distribute weight and refresh the appearance of your room evenly. By being mindful of how different pieces of furniture interact with your carpet, you can keep your living space looking pristine.

Types of Carpet Dents

There are different types of carpet dents, such as furniture marks and pressure imprints, and each one requires special treatment to get rid of those pesky indentations. Understanding the differences between these carpet types and their unique characteristics can assist you in the restoration process. Whether lifting carpets or working on surface-level repairs, knowing the right method is crucial for keeping everything looking sharp.

For example, furniture marks often come from heavy items sitting in one place for too long, leaving behind unsightly indentations. To fix this, you can use ice cubes to gradually melt the fibres or vacuum on a high setting to lift the pile back up.

Pressure imprints might be less noticeable but still detract from your carpet’s overall appearance. In this case, gently brushing the fibres with a soft carpet rake can help restore their original form.

With a little effort and the right techniques, you can breathe new life into your flooring and ensure it continues to look its best.

Preventing Carpet Dents

Preventing carpet dents is much easier than trying to fix them later. It usually just takes a few simple adjustments to your furniture arrangement and a little commitment to keeping things clean.

Protective pads under your furniture or moving heavy items around can significantly reduce the chances of those annoying indentations. Furthermore, choosing durable carpeting that suits your lifestyle can make all the difference in keeping your carpet looking great and lasting longer.

Tips for Avoiding Furniture Indentations

To avoid those pesky furniture indentations, consider using furniture sliders to move heavy items around easily and opting for lightweight furniture whenever possible. Implementing smart protection strategies—like regularly shifting your furniture and doing routine carpet maintenance—can reduce the risk of dents. These practical tips help preserve your carpets and enhance the overall look of your home decor.

Using these tools, you can effortlessly rearrange your living spaces while minimising wear and tear on your carpets. Start by sliding those furniture sliders under your sofas and coffee tables; moving them is a doddle when cleaning or redecorating. Choosing lightweight and stylish furniture adds a nice touch to your home environment.

Regularly changing up your layout will not only keep permanent marks off your carpet, but it will also keep things feeling fresh and inviting. Don’t forget to vacuum and steam-wash your carpets regularly to remove dirt and debris that could lead to scratches, ensuring they last longer and look great.

Fixing Carpet Dents

Fixing carpet dents can be a doddle. Various quick and easy methods are available, including some DIY carpet repair techniques that are both effective and budget-friendly.

Whether you prefer home remedies or professional cleaning solutions, knowing the right approach to restoring your carpet can extend its lifespan. Embracing a few household tips will enable you to tackle these minor issues confidently.

Quick and Easy Methods

There are some quick and easy ways to fix those pesky carpet dents, like the steam iron method and the ice cube trick. These techniques use a little heat and moisture to help restore those carpet fibres. They’re super effective and often give you results in just minutes, perfect if you want to spruce up your carpet’s appearance.

To start with the steam iron method:

  1. Make sure your iron is set to low heat.
  2. Cover the damp area with a clean cloth to protect those carpet fibres, then gently press the iron on top for a few seconds.
  3. Once you remove the iron, grab a fork and fluff the fibres back into place.

If you want to try the ice cube trick, place a few ice cubes directly on the dent and let them sit until they melt. Once the moisture has soaked in, blot up any excess water and fluff the area with your fingers.

These quick fixes make a big difference, transforming your carpet and bringing it back to life quickly.

Professional Solutions

If you like a thorough approach, professional cleaning services can be your best friend for restoring carpet texture and ensuring longevity. They use advanced cleaning supplies and techniques to tackle deep-set dents, keeping your carpet looking pristine. Investing in professional care saves you time and gives you peace of mind about your carpet’s health.

With specialised equipment and trained technicians, these services not only fix visible damage but also enhance the fibres’ resilience against future wear. Regular professional maintenance can revitalise your carpets’ appearance and extend their lifespan, making it a smart move for any homeowner.

These professionals can handle stubborn stains and odours that standard cleaning can’t tackle, ensuring your space remains fresh and inviting. Ultimately, opting for professional help can create a healthier home atmosphere since their methods often eliminate allergens and dust, contributing to your overall well-being.

Precautions and Tips

Taking the proper precautions regarding carpet care can help you manage the damage and keep everything looking great for the long term.

Using practical tips and simple household solutions, you can protect your carpets from those pesky dents and maintain their beauty. Knowing how important carpet safety is will give you the confidence to create a more inviting and visually appealing space.

Things to Keep in Mind

Keeping a few key things in mind about carpet upkeep can boost your carpet’s health and extend its lifespan. Regular furniture maintenance and clever flooring solutions prevent dents and keep your rugs looking fresh. By grasping these points, you can ensure your carpets remain a beautiful part of your home decor for years.

Vacuum regularly and tackle stains immediately to protect carpet fibres from wear and discolouration. For instance, if someone accidentally spills juice, quickly blotting the area with a cloth can save you from lasting damage. Rotating your rugs every few months is another useful tip that helps balance out foot traffic and can significantly extend the life of your carpets.

Engaging in these practices protects your investment and creates a healthier living space, making your home more welcoming for family and guests.

Maintaining a Dent-Free Carpet

Keeping your carpet looking dent-free isn’t just about tackling problems when they arise; it’s all about consistent maintenance and care practices that help preserve its beauty and durability.

By incorporating some simple household tips into your routine, you can ensure your carpets remain looking new and vibrant for years. This proactive approach enhances your home’s aesthetic appeal and helps maintain the overall health of your flooring.

Tips for Keeping Your Carpet Looking New

To keep your carpet looking fresh and new, regular cleaning and vacuuming are key practices that help with preservation and longevity. If you use eco-friendly cleaning methods, you’ll ensure that your carpet fibres stay intact and vibrant, plus it’s better for the planet. By focusing on surface restoration and proper care techniques, you can keep your carpets looking great for years.

Here’s a handy tip: vacuum at least once weekly to avoid dirt build-up and prevent wear and tear on those fibres. If spills happen, immediately jump on spot cleaning with natural solutions like vinegar and bicarbonate of soda—they’re great for lifting stains without the harsh chemicals.

Schedule professional cleanings every 12-18 months to give your carpets a deep clean and a little rejuvenation. Placing mats at entryways can cut down on the dirt you bring into your home, which helps keep your carpet looking pristine for longer.